The weather is getting warmer, and the sweet smell of sewage is wafting through your cabin. Why? Maybe you took a winterizing shortcut last fall and failed to clean the holding tank thoroughly, leaving a sewage/antifreeze mix that became a smelly sludge glued to the tank bottom. Or maybe you’ve never rinsed your tank after pumping it out. Whatever the reason, your nose knows that this problem won’t go away; you have to attack it.

Use your head when it comes to your head: Rinse the tank after each pump-out.
Chances are the odor is escaping through the plumbing, not permeating the walls of the holding tank. Nevertheless, it doesn’t help the situation if the inside of the tank smells like an Ozarks outhouse. Yep, cleaning it is an annoying, sometimes dirty job—but after doing it once, you’ll be more scrupulous about rinsing the tank after every pump-out and before lay-up. Consider it penance for past laziness.
First, inspect the holding tank to confirm it’s not leaking. This is especially important if the tank is metal and more than a few years old: Acids in urine will eventually eat through metal. If you find leaks, you’ll need to replace the tank. No leaks? Keep reading.
Liberal doses of H2O should clean the tank. Use fresh water—it’s free of algae, microbes, and other pollutants that can create odors of their own. (Boats with freshwater vacuum-flush heads have fewer odor problems.) Fill the tank about a quarter of the way full with a hose through the deck pump-out; the pump-out pipe reaches to the bottom of the tank, so the inflowing water will stir up the gunk down there. Take the boat out for a ride to let the mixture slosh around. (RVers add ice cubes to dirty holding tanks before going for a drive; the cubes scour the tank. Would that work on a boat? Maybe.)
Alternatively, open the inspection port on the holding tank, and shoot a high-pressure stream of water directly onto the sludge to break it up (be careful of back-spatter). This lets you get into all the corners of the tank; you can also rinse off the walls. While you’re here, check the floats of the tank-monitoring system to ensure they’re not wedged in the “full” position by dried waste or bits of toilet tissue. Clean and grease the O-ring in the cap before resealing the tank. Finally, make sure the vent is clear—a back-and-forth flow of fresh air works wonders at preventing smells—and replace the filter if it has one.
Now pump the tank, refill it, and pump it again; repeat this process until the discharge is clean. It might take several cycles. Then treat the tank with a cleaner/deodorizer to kill any remaining whiff. Raritan’s K.O. is a good choice: It’s bacteria-based—the critters will eat both liquid and solid wastes in the tank—nonchemical, and biodegradable. During the season, rinse the tank with fresh water every time you pump it—easier said than done if there’s a line at the pump-out station, but do it when you can. Add K.O. or another odor-fighter after every pump-out, too.
If you’ve been living right, cleaning the holding tank might solve your odor problem. If not, the next step is to tackle the hoses, Y-valve, macerator pump, and other potential leak sources. We’ll cover this in a future “Around the Yard” column.
Ask the Experts: Peggie Hall
The question: My holding tank is cracked and leaking. Is one tank the same as another? What should I know before replacing it?
The answer: We turned to Peggie Hall, a marine-sanitation expert with more than 20 years’ experience designing, repairing, and maintaining systems. Hall served on the American Boat and Yacht Council technical committee on sanitation; she conducts seminars, provides private consulting services, and dispenses advice on several Web boating forums. She is also the author of Get Rid of Boat Odors! A Guide to Marine Sanitation Systems and Other Sources of Aggravation and Odor.
“A good, thick-walled plastic tank is best,” Hall says. Choose rotomolded polyethylene with a minimum 3/8-inch wall thickness. “Second-best is welded polyethylene, although the quality depends on the skill of the welder,” she adds. Stay away from cheap, thin plastic tanks, sometimes less than 1/4 inch thick; they can’t support the weight of the contents. Fiberglass tanks can suffer the same problems from long-term immersion as fiberglass hulls, e.g., blisters. And never use metal tanks. “Urine is so corrosive that, on average, even the best-quality metal tank will start to leak at a seam or fitting within two to five years; after about ten years the bottom will look like a colander,” she says.
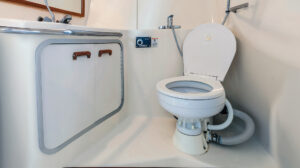
Location is key, too. Hall says boatbuilders often install tanks where it’s most convenient rather than where they ought to be, so if you have to replace the tank, now is the perfect time to move it, too. “Optimally, the tank should be no more than six feet from the head,” she says. “Why? That’s as far as the bowl contents will move in the time 99 percent of users will spend flushing.” If the tank is lower than the head, gravity will permit a bit more separation, but if the boat is, say, 40 feet long with two heads, “often you have to bite the bullet and use two tanks, with two deck pump-outs,” she adds.
And don’t forget the vent lines. They should be as short, straight, and horizontal as possible; five feet is a good length. Hall recommends using a one- or even a 11⁄2-inch-diameter vent rather than the standard 5/8 inch, even though it means using a nonstandard fitting in the topsides. “I’m not a fan of vent filters, either. The filter impedes the free flow of air, which you need for odor control.”
Once you’ve decided on a location, find a tank to fit the space. “Ronco Plastics
has over 400 shapes and sizes; they’re the best source on the planet for water and holding tanks,” says Hall. Ronco will install the fittings you want, where you want them. “I prefer two discharges, because it eliminates the Y-valve—one less thing to break. Ideally the inlet, outlets, and vent should be on top of the tank, which eliminates standing waste in the hoses,” she explains. “However, that requires at least five inches of clearance above the tank, which isn’t always possible.” Top-mounted fittings let you disconnect the hoses without spillage even if the holding tank is full. “Have you ever known a macerator to fail when the tank wasn’t full?”
Finally invest in top-quality hoses. Hall recommends just two brands: Trident Sani Shield #101 and #102, double-walled hoses with high odor-resistance; and SeaLand. “Double-clamp everything, with the clamp screws on opposite sides of the hose,” she notes.
If you follow Hall’s advice, replacing your holding tank should hopefully be a once-in-a-lifetime ordeal, or nearly so. “The tank on my own boat was still in excellent shape after 20 years,” she says.
This article originally appeared in the June 2008 issue of Power & Motoryacht magazine.


