
By Capt. Bill Pike
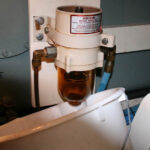
My first step was, of course, shutting off the fuel valves on both my two fuel tanks. Then I put a bucket under the unit and removed the plastic drain assembly (which I discovered was on the verge of failing) from the bottom of the bowl using an adjustable wrench, thereby allowing quite a bit of fuel to whoosh into the bucket. Loosening the assembly meant rotating it counterclockwise, by the way. Backing off the T-handle at the top of the unit and removing the topside lid, as well as the filter element inside the canister, finished the draining process in short order.
The next step was kinda tricky. The four, Phillips-head machine screws holding the metal ring (and the bowl) in place had not been removed in many years and were virtually frozen in place. So I gave each screw a shot of Kano Laboratories Aero Kroil (www.kanolabs.com), the fastest, most trustworthy penetrating oil I know of, waited a minute or two, and then used an appropriately sized, ratchet-equipped Phillips-head screwdriver (and plenty of pressure) to back the screws out. They came away rather satisfyingly, I must say.
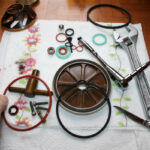
When I removed the metal ring it was quickly obvious that the gasket that seals the metal ring and bowl to the canister bottom was the problem. As luck would have it, I’d already purchased a new one (shown in my fingers above), along with a whole bunch of other paraphernalia that came in a $56 “Gasket Pack,” as well as a new drain assembly for $55.97 from Parker Racor. Yeah, I first tried to buy just the gasket and the drain assembly, but no dice. I had to buy the rest of the stuff as well. But hey, at least the extra lid gaskets (black) and the little gaskets that seal the T-handle base (reddish orange) that came in the Gasket Pack may come in handy some day.
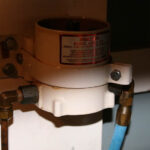
The turbine centrifuge/conical baffle component inside the glass bowl came out readily enough and I cleaned it in fresh diesel, being careful not to lose the lightweight “check ball.” After installing a new check ball seal (from the Gasket Pack again), the spic-and-span check ball, and a new bowl gasket (the one shown in my fingers in the photo above), I reattached the bowl using the four machine screws and the metal ring. Then I secured the new drain assembly to the bottom of the bowl with the supplied gasket, remembering to tighten the assembly by turning clockwise.
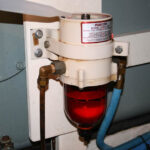
Swapping out the old T-handle and lid gaskets for new ones, and installing a new 30-micron Racor filter element, pretty much finished the project. While the lid was still off, I opened one of my two fuel valves slightly and let fuel pressure fill the canister almost to the top. Then I returned the valve to the off position temporarily and finished the job with a turkey baster. After securing the lid and opening both fuel valves all the way, I finally bled the secondary fuel filters on my Lehman SP135 diesel so there was no chance I’d air lock the old girl. Better safe than sorry, I always say.
Tough job? No, not really. Took me about two hours. The reliable old Lehman cranked up and ran like a top afterwards. And I suspect she’ll continue to run that way for many a year now.