

A Mere Two-Hour Job
The do-it-yourself retrofit Walker Airsep kit for the naturally aspirated 135-hp Ford Lehman diesel retails for $549.95 and is easy–even fun–to install. I cranked up my own little project one Sunday afternoon by taking all the parts out of the box that came from Walker Engineering and laying them out on my saloon table while looking over the two pages of simple instructions and drawings. After dry-fitting the various components and comparing the result to Walker’s system schematic to make sure I had everything I needed, it was time to get going (see corresponding photos):
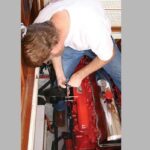
1.) I removed the original air cleaner with a ratchet-type socket wrench by backing out the four bolts that were securing it to the Lehman’s long plenum chamber. Then I carefully pulled the gasket away (laying it aside for safekeeping) and cleaned the mounting surface underneath using a clean rag and some WD-40. (The sponge material inside was damp with oil.)
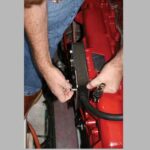
2.) Lining up the new Walker air plenum (the powder-coated black part with a tubular opening on one end) with the four bolt holes, I delicately repositioned the gasket, inserted the bolts, and tightened them evenly, thus snugly seating the plenum against the mounting surface and gasket.
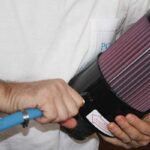
3.) I slipped the rubber hose at the end of the Airsep over the tubular opening on the end of the plenum and secured it with the hose clamp provided. It’s critical that the Airsep unit be rotated so that the drain at the bottom points down (toward the bilge) to facilitate drainage of oil into the oil-return fitting on the side of the crankcase.
4.) Using various flexible hoses and clamps, I interconnected the vent cap on the valve cover, the inlet pipe atop the Airsep, and the Walker vacuum regulator that communicates between these two parts. I then trimmed some over-long hoses with a utility knife.
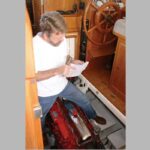
5.) I screwed the bronze Walker check valve (which prevents crankcase oil from sneaking back into the Airsep) into the black plastic plug for the oil-return fitting on the side of the engine and then connected the Airsep and check valve stem using a flexible hose. After removing the cap from the oil-return fitting, I inserted the plug, thus completing the check-valve-protected route that allows the oil to drain into the crankcase. Again, some trimming of flex hose was necessary to guarantee a good fit and ensure there were no low spots for oil to pool.
6.) Finally, I kicked back to admire the completed job for a bit while bearing in mind that I’ll have to clean or replace the filter on the Airsep once a year or whenever the air-restriction gauge atop the unit shows red. From start to finish, the entire installation extravaganza took me a mere two hours.
–B.P.
This article originally appeared in the November 2008 issue of Power & Motoryacht magazine.
While removing the old air cleaner I had to be careful not to tear the rather sticky underlying gasket.
Because the Walker plenum’s thinner than the old cleaner, I had to substitute four shorter bolts.
The hose clamp that secures the tubular connector to the Walker Airsep unit is top-shelf.
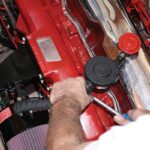
That’s the vent cap (red) just a few inches from Walker’s negative-pressure-inducing vacuum regulator (black).
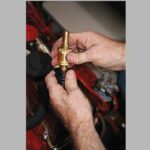
The plug that holds the check-valve fitting slides snugly into the oil-sump-access fitting on the engine’s side.
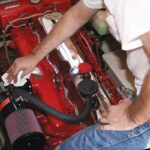
An aesthetically pleasing sight! Especially once the smudges are removed from the chrome dome.


