

Photos by Marc Asnin

They used to say a man wasn’t well-dressed without a hat, and maybe that’s true of boats, too. A hardtop provides a place to mount the radar and antennas and keeps the sun off your hatless head. It provides better shade than a bimini, lasts a heck of a lot longer than canvas, doesn’t thrash around in choppy weather nor billow like a parachute when the wind gets under it.
About the only thing wrong with a hardtop is the cost of having one custom-designed and -built. But today you don’t have to go that route: You can buy an off-the-shelf model at less cost, have it delivered to your boat, and install it yourself, or you can hire a pro to do it for you. Here’s how one couple handled the job.
Dan Mosher and his wife, Judy, enjoy projects. Long-time boat owners, their current challenge is restoring a 1986 Egg Harbor 37 Convertible that in 2005 came out on the short end of an encounter with a rock. The collision and subsequent sinking pushed one strut through the bottom, ruined the twin gasoline engines, and did more water damage than most people would want to deal with. But after more than two years of work, the boat, renamed Second Look II, was almost ready to launch.
The last project before the TraveLift arrived was to install a hardtop; the Moshers chose one from Atlantic Towers in Bayville, New Jersey. Atlantic builds the top to fit the boat but leaves the legs long for on-site trimming to allow precise height adjustment. Installation involves only basic tools and skills, but it helps to have done it once or twice before, since there are a few tricks. The Moshers hired independent contractor Tom Lynch to install theirs.
The slide show demonstrates how the installation proceeded.
This article originally appeared in the October 2008 issue of Power & Motoryacht magazine.
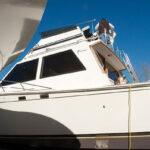
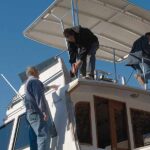
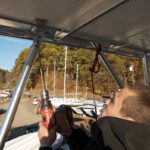
Second Look II is a standard issue 37-foot Egg Harbor convertible, a vessel that was popular back in the 1980’s. Without her hardtop, this boat’s flying bridge looks almost naked.
The hardtop arrived on a trailer and was well-packed and protected for shipping.
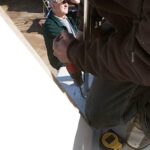
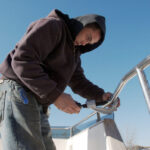
Before drilling the first hole, Lynch measured the flying bridge every which way, then he measured it again, and then rechecked his work.
Next he measured the hardtop, just to make sure it would fit.
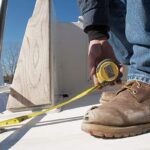
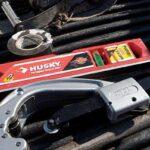
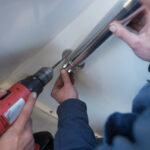
Other than a drill, installing a hardtop demands only simple tools.
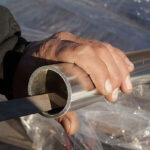
The existing flying-bridge rail would need “adjustment” using a tubing cutter.
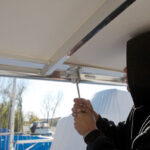
A portion of the flying-bridge rail had to come out before the new top could be hauled aboard and positioned.
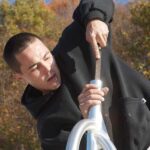
Lynch’s assistant, Jim Sullivan, made a cut in the railing, which would allow him to remove a section without causing damage. Owner Dan Mosher would later re-install it around the tower leg.
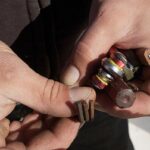
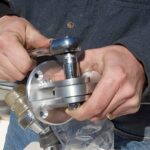
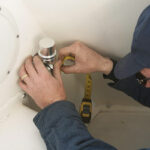
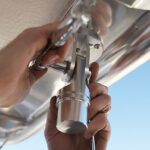
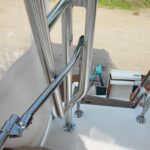
The hardtop mounts on these aluminum pads.
After Lynch arranged his tools, he attached a base casting to each pad.
The hardtop legs could then slide over the castings.
Lynch measured and marked each hardtop leg for cutting.
Sullivan could then make the cuts with the tubing cutter.
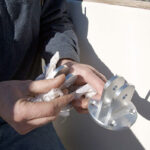
After the cuts were made, Sullivan removed all burrs and sharp edges with a coarse file.
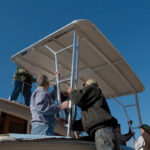
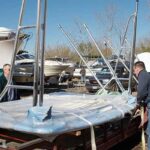
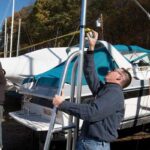
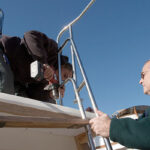
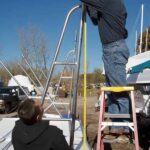
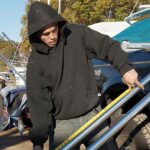
Passers-by help hoist the hardtop.
Once the hardtop was on the bridge, Lynch secured it with both lines and braces, and then attached the pads using Marine-Tex adhesive and set-screws. Then they were bedded in silicone and bolted in place.
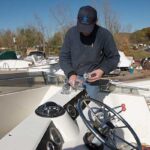
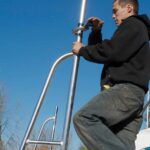
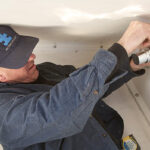
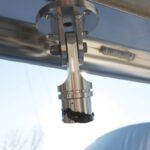
Lynch locates and drills for the forward-leg mounts.
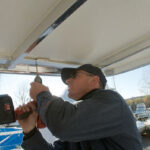
The forward legs attached to pads mounted on the inside of the bridge; they were through-bolted into metal backing plates. Removing two stereo speakers allowed Lynch to reach the nuts without cutting access holes.
Lynch marked the forward legs for cutting.
Sullivan used a chop saw to cut the forward tower legs to size. Then he de-burred them using a coarse file.
The insides of the tower tubing had to be completely de-burred to get a good bond with the Marine-Tex adhesive.
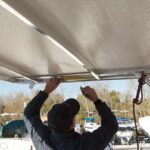
Sullivan bolted the upper pads to the hardtop using holes drilled earlier.
The upper ends of the legs attach just like the lower ends, but aligning the pads correctly requires special care.
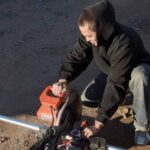
Before sliding the leg into place, Sullivan added a bead of Marine-Tex to the casting.
Finally, the lower pads were bedded in silicone and through-bolted.
Sullivan carefully drilled the final holes.
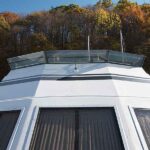
The hardtop also got two athwartships braces to the centerline of the flying-bridge coaming to make sure it doesn’t torque at high speed or in a seaway.


