

Get Buffed
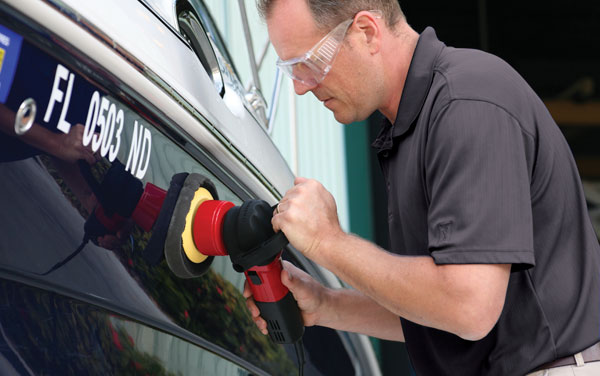
Polishing and cleaning your boat with a power buffer may be intimidating at first, but after you get used to it your hull (and your forearms) will thank you.
Making the move from polishing your boat by hand to doing it mechanically may be intimidating. You don’t want to mess up that shiny gelcoat, but the thought of spending another day manually massaging compound and polish until your arms almost fall off is pretty persuasive too.
So let’s say you’ve now decided to upgrade to a power buffer. There are a number of units from manufacturers such as 3M, Makita, and Shurhold, and the most popular models have common features. First up is orbital operation. Traditional polishers spin at a relatively high rate on a single axis. Leave one in one spot for too long and you’ll burn your gelcoat. For my boat I chose Shurhold’s Dual Action Polisher, which oscillates in a variable orbit across two axes. This means that the buffer is touching the surface it’s polishing in a very random manner thereby avoiding the concentration of power in one spot and the burning and ugly swirl marks that result. Additionally, the 6-inch head is a little smaller than on professional models so it’s easier for a non-pro to handle. And it also saves money in the long run, I think, because it uses less compound and wax than manual methods.
The second key feature to look for in a buffer is variable speed. You need different rpm or speed settings for different types of tasks. For example, the Dual Action Polisher I have has six speed settings, ranging from 2,500 oscillations per minute (OPM) for waxing and buffing, 3,900 OPM for polishing and cleaning, and 6,500 OPM for removing paint defects and oxidation. It also has a 20-foot cord.
Once you have the right equipment, you’ve got to make sure you’re using the correct technique. For tips on the subject I talked to Steve Hilton, president of Sebago Custom Fiberglass (207-655-3425) in Casco, Maine. The prevailing theme of our discussion was that spiffing up a boat is not a quick process even with a power buffer. Hilton takes between six and eight hours to finish even a small job properly.
He starts a project by washing down the boat with a dish detergent like Dawn to remove any oil and scum. For tougher stains, he uses On & Off Hull & Bottom Cleaner. Once the boat is dry, he removes any deck hardware that isn’t through-bolted—including cover snaps—and tapes off the windshield edges.
Fear of Wet Sanding
So you’ve applied two coats of compound and you’re still not happy with how your boat looks? It may need to be wet sanded. Relax, this is not as scary as it sounds. Working by hand, use quality sandpaper like 3M’s Imperial 2000-grit product, keep it wet, and work in small areas to remove scratches. If you want to start with a heavier grit, make sure you follow with progressively lighter ones until you get to 2000 and then follow up with compound.
The next step, he says, absolutely calls for the right materials. Plain wax does not restore faded gelcoat. It is a UV protectant that will look good for a couple of weeks. Instead, Hilton likes Presta Strata Ultra Cutting Crème, which is a compound and polish in one. It removes oxidation, weathering, and swirls. Moreover, it’s aggressive enough to remove wet-sanding scratches (see “Fear Of Wet Sanding,” above) left by sandpapers as rough as 1500 grit and still produces a high-gloss shine. I personally like Shurhold’s Yacht Brite Pro Polish.
In any case, Hilton says when you start working, do so in a small area. Applying compound with a rag to the whole boat and then buffing it out is the wrong approach. “If it dries on the surface, you’re really not going to improve anything,” he explains. “For compound to work, it needs to be wet.”
Hilton applies his polish with a 1-inch paintbrush in three horizontal strips in a 1- by 3-foot area. He then goes to work with a wool pad on a slower speed setting on his buffer. “Try to carry the compound down the side of the boat using a side-to-side motion,” he says. “Then once you get to the bottom, make a few passes back and forth with the compound.”
A wool pad should be used for more oxidized surfaces, according to Hilton, and a foam pad works for less faded surfaces. Avoid banging your buffer against stainless steel hardware, he adds, because it will create a black mark on the buffer pad that will transfer to the gelcoat. For darker hull colors, a second treatment may be needed.
Swirling is a bigger issue than burning your gelcoat, Hilton says. “You have to be laying on a spot for a really long time to burn it,” he says. To avoid swirls, he adds, clean your buffing pad regularly. You do this by scraping the surface of the pad with a paint-stirring stick while the buffer is turned on. Even on a relatively small, 24-foot boat, Hilton will stop to clean his buffer pad at least six times.
Take your time, use the right equipment and material, and you’ll take the intimidation out of making your boat look great.


